
(Apologies, friends! I hit the wrong button when going to schedule this article! Whoops!)
So, you want to try and get into RPG Maker? Or you’ve got some ideas for some video games in your head, but have no idea of where to start? Or you’ve never had either of these thoughts ever before, but you aren’t opposed to the idea? Well then have I got the deal for you, because this week we’ll be diving into an overview on how you can get started with the RPG Maker program, one of the easiest and coolest game design programs ever created!
It’d take me weeks of in-depth articles to really go over what you need to know about this program (and hey, maybe I’ll do that one day), so for now I’m just going to give a surface-level look at the sorts of things you’re able to do with this program. Maybe it’ll spark some inspiration in you!
Let’s get into things!
(Also, I’ll specifically be referencing the most advanced version of the program, RPG Maker MZ, but honestly they all work pretty identically.)
The Database
The first thing you’ll see when you boot up RPG Maker is the map screen. As tempting as it is to just start drawing a map, you’ll really want to look into the Database before anything else.
There’s a lot of tabs to go over. Let’s kick things off with the “System 1” tab.
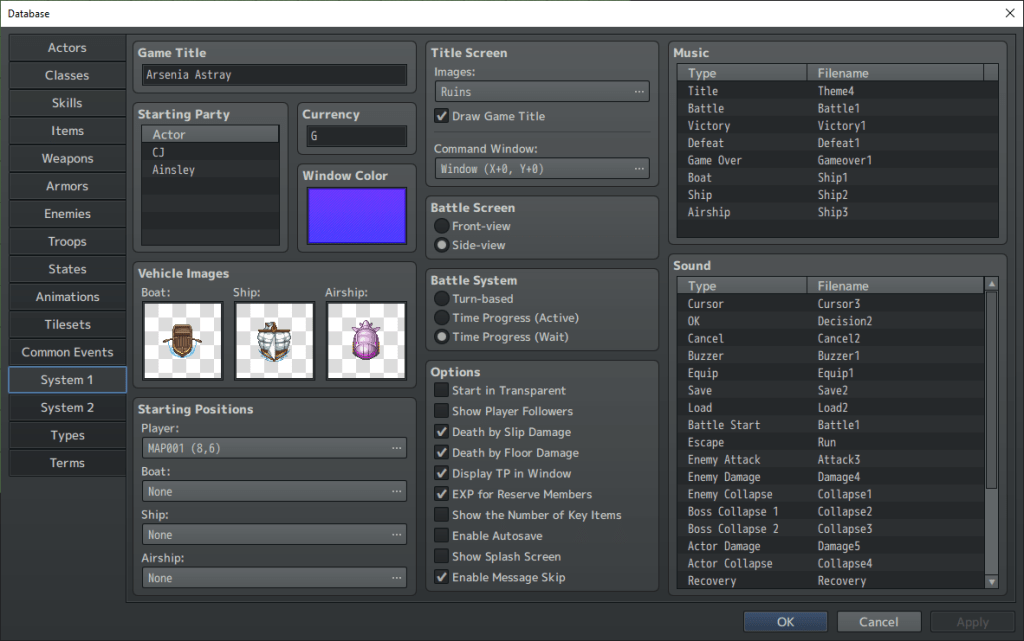
This is probably where you’ll want to begin your journey. Why? Because it’s where you can choose the title of your game! Also, you’re able to decide what the title screen looks like, and you’re able to select specific menu music and sounds (like changing what song plays on the title screen, or what song plays when a battle is won). You’re also able to choose what map your character begins their journey at, and even the color of the border of the screen while the game is being played.
It’s not too exciting, this page, but it’s still pretty vital to the entire experience.
Now let’s move onto the “Actors” tab.

This will probably look much more normal to you. After all, who has ever played an RPG and doesn’t know what this screen would be for? It’s where you decide the names, classes, stats, attributes, and designs of your party members! The main hero, the plucky priestess, the dashing debonair, the swashbuckling scoundrel, the shifty spy…it’s all done here! Let your imagination run wild, and see what you’re able to come up with in terms of the heroes (or anti-heroes) you wish your players to be able to use during the journey!
As a quick aside, here’s the “Character Generator” page.
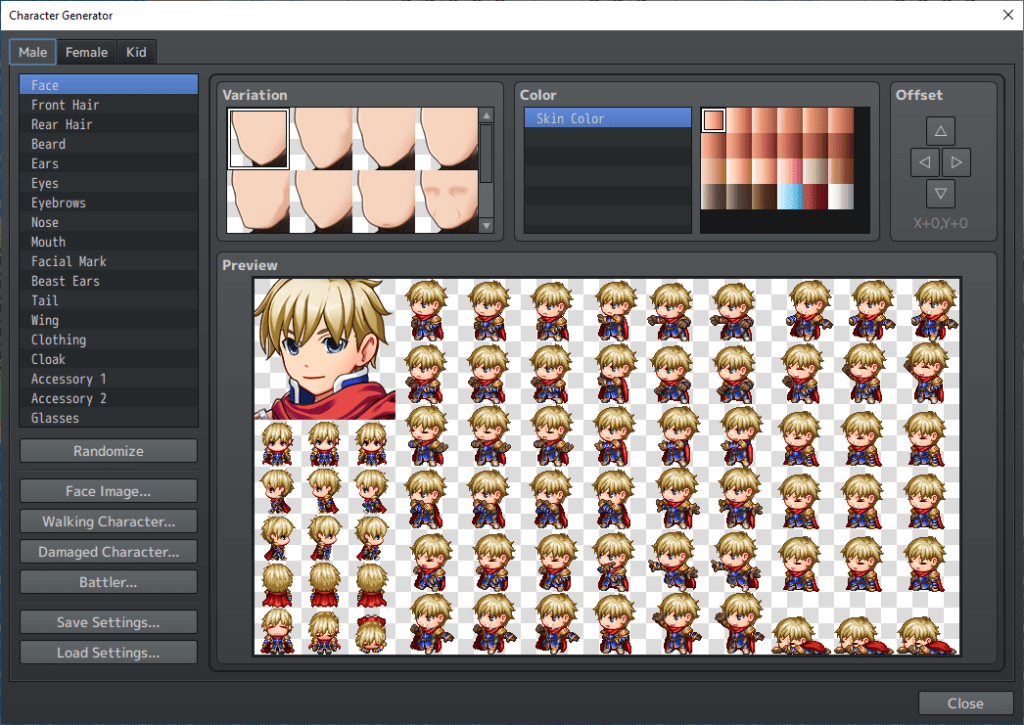
It’s not something everyone will use, but it is super fun to play around with. RPG Maker MZ gives you a lot of pre-made designs for characters, but in case you need something a little more special, you can just make the characters here yourself! There’s tons of options that allow for a lot of creativity. These characters can even be exported and then loaded back into another project file, so your past characters can cameo in your other games, or star in the sequels!
Back on track, here’s the “Enemies” tab.
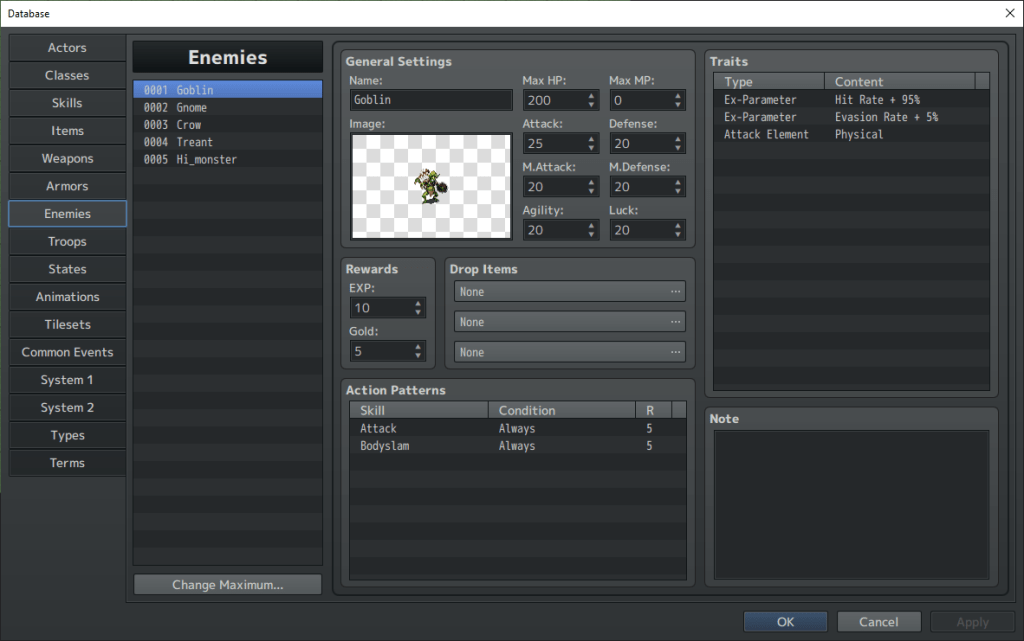
This is the other page you’ll be using a lot of. Because what is an RPG without terrifying enemies and motley mooks to fight? Similar to the “Actors” tab, you type in your own names, pick from the huge selection of available enemy graphics, and then give them stats, traits, and attack moves to your heart’s content! Go wild! There’s so much advanced-level stuff to dig into, but you know what the best part is? RPG Maker MZ comes prepared with hundreds of pre-made moves that you can pick without fuss. Basically, this program tries to make it as easy as possible for you to put together your first-ever game.
You’ll note the “Troops” tab right below the “Enemies” one. That’s where you’d go to actually arrange enemies into the groups that your players will fight. That’s also the menu where you can mess around with battle-specific settings. Like if you want dialogue during a fight, or a dramatic music change, or an unexpected second phase for the big scary boss. That’s all done there.
The other tabs in the Database are important too, but more situational. “Items” is where you can define and detail certain items your characters will use in their adventure (like potions, or keys), “Skills” are where you can program new attack moves for your heroes and their adversaries (this menu gets tricky, and is best saved for when you’re more skilled with this program), and “Terms” is where you define the word usage in your game (like changing the standard phrase “Gold” to “Gems“, or renaming “Magic” as “Arcane“, or what have you).
To end of this section, here’s a look at the “Resource Manager“.

This probably looks scary, but it’s where you can add your own custom materials to RPG Maker MZ! Made some terrifying enemies in an image-editing software? Import them here! Designed your own sprite graphics for the main characters? Add them in with this menu! Composed your own catchy tunes in an audio-mixing software? Put them into your game using the Resource Manager, and truly make this experience your own! Though please rest assured that RPG Maker MZ comes with more than enough materials built-in for most purposes!
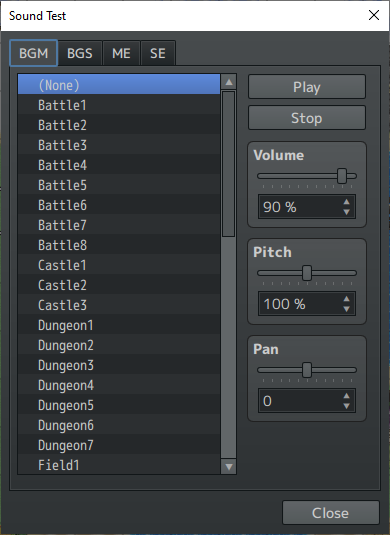
And here’s what the basic “Sound Test” looks like. As you can see, this program comes with a lot of music and sound effects ready-to-go for your first few creations!
Map Editor
Okay…now you can start messing around with the map editor!
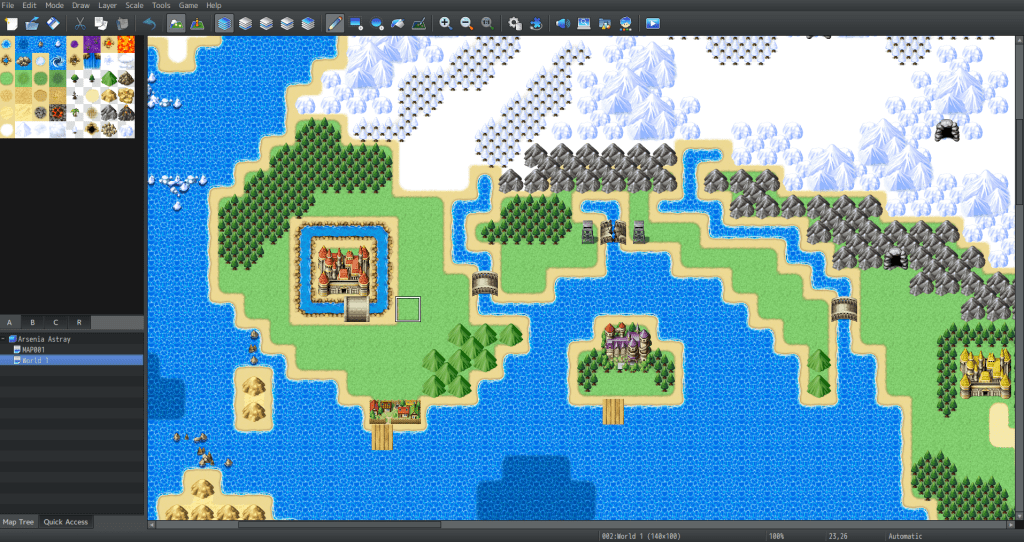
If it looks complicated, trust me when I say that it isn’t! Honestly, it’s as simple as painting with a digital brush! You simply select what tile you want, and then paint it onto the canvas that is your map! Want more mountains? Click the little mountain icon and start drawing them in! Want a bigger ocean? Do the same but with the water tiles! Want a desert or grassland or frozen tundra? Go for it!
And that’s just for the overworld (the zoomed-out view of your world map). You can get even more detailed when you’re designing towns, cities, castles, dungeons, and more. There’s tons of different tiles, objects, and accessories which you can use to populate your maps and bring them to life. And if you get stuck, or lose a bit of that creative juice? There’s over 100 sample maps that you can load into your game with the click of a button, customize to your liking, and then go from there!
Event Editor
And here’s where the meat-and-potatoes of RPG Maker takes place.
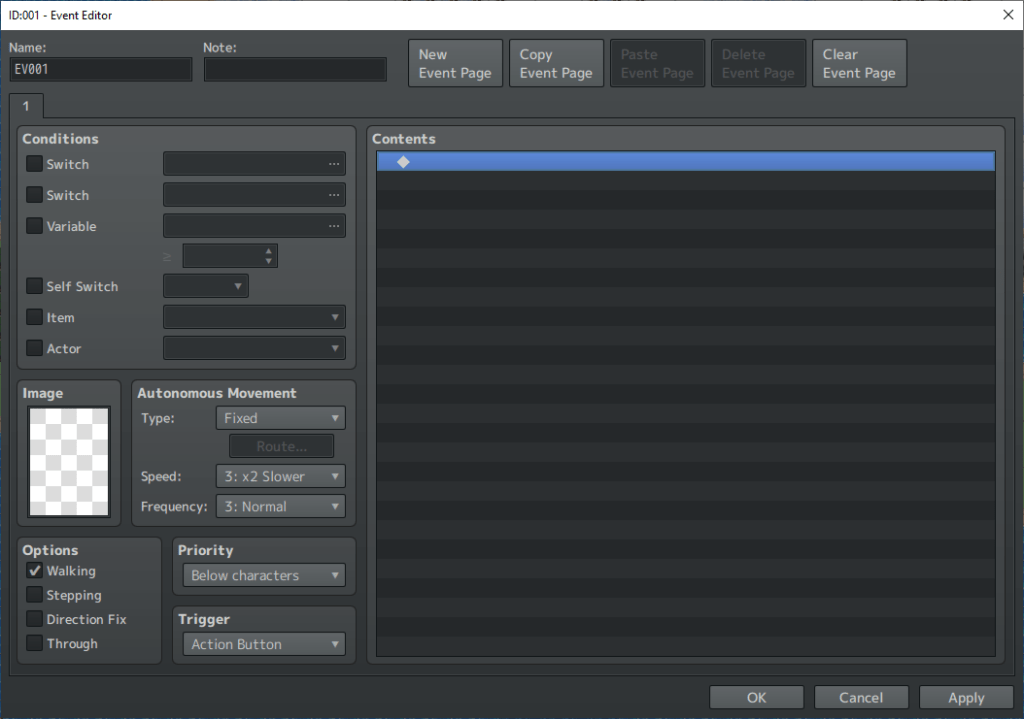
I won’t try to pretend that this isn’t a complicated menu, because it is. Seriously, if you’re going to use RPG Maker MZ, you’ll eventually get to the point where you’ll be spending hours in this menu. Because it’s where basically all the magic happens. It’s how you do dialogue, it’s how you create cutscenes, it’s how you put NPCs into your world, it’s how you create moving objects, it’s how you implement treasure chests, it’s necessary for putting in puzzles…it does so much, and then even more!
But it’s super complicated, so for today, let’s focus on just a part of the entire Event Editor.
And so this, the “Event Commands“, is what you see when you actually click one of those empty rows in the Event Editor. It’s got three pages. Here’s the first page.
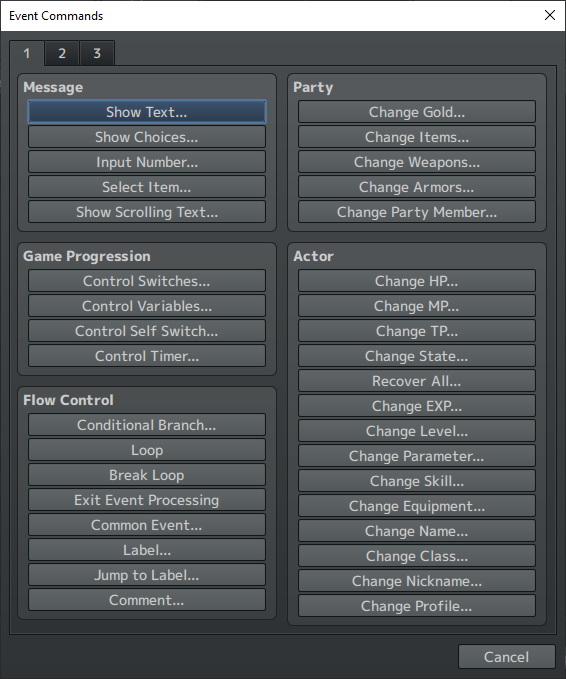
A crazy amount of stuff, right? Let me just overview some of it.
“Show Text” is for inputting dialogue. “Change Party Members” is what you’d use if another hero wanted to join the party. “Show Choices” is how you could do dialogue options (which then branch out into different paths you have to keep track of!). “Control Switches” are…honestly, really complex, and best saved for later. As is a lot of other stuff on this page, actually!
And here’s the second page.

A little more digestible here, right? “Transfer Player” is how you’d warp a player from one map to another (like if they go through a door or step on a portal). “Set Movement Route” is for programming a character/object to move around (like a guard on patrol, or a ball rolling down a hill). “Flash Screen” and “Shake Screen” do exactly what they say, and are really cool for big dramatic moments in the story. “Play BGM” plays some music, of course, and “Wait” adds a bit of float time between actions (like if you want a character to take a dramatic pause between lines of dialogue).
And finally, here’s the third page.
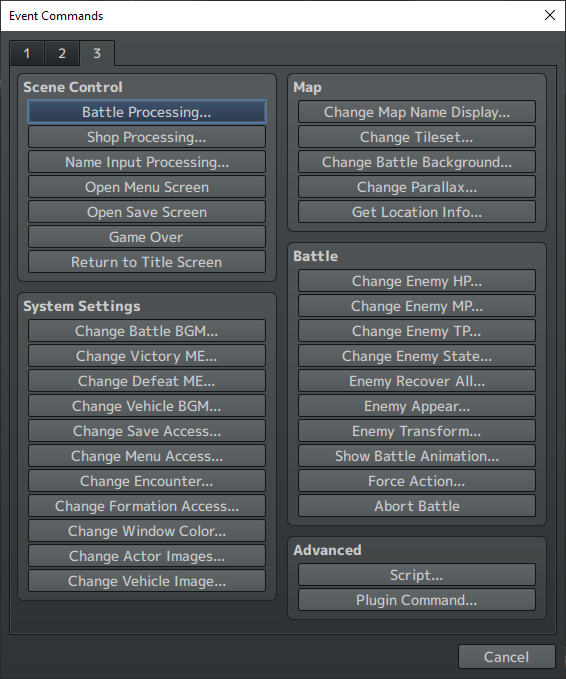
Looks a little more confusing, but it’s mostly straight-forward. “Battle Processing” is for whenever your characters want to fight an enemy, “Open Save Screen” is useful to give your players the chance to save right before a big boss battle. “Name Input Processing” allows your players to give their own names to characters, which is fun and immersive! Every option under the “Battle” category is for playing around during fights and doing some dramatic and advanced techniques. And “Script” is for coding, and I stay very far away from that. I’m not a fan of coding, and thankfully it’s completely optional to one’s enjoyment of RPG Maker MZ!
When you choose “Set Movement Route” to move an NPC or object around, you’ll see this menu pop up.

A lot of options, but pretty intuitive, right? If you want your character to move or turn a certain way, just choose the correct option from this list! Better still, hit the preview button and you’ll see a real-time demonstration of what your planned movement route will look like! Older RPG Maker versions didn’t have this option, and it’s so amazing to use!
And lastly, when you select “Show Text”, here’s the box that pops up when writing dialogue for your characters!
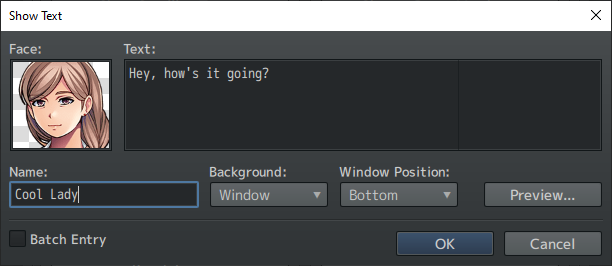
Quite simple, yeah? Pick the face of the character speaking, type in their name, and then add their dialogue! The only thing you really have to be careful of is your text running off the screen, so be sure to liberally use that preview button to make sure everything is aligned and formatted properly!
Whew, that’s a fair bit! And I honestly didn’t even scratch the surface of what RPG Maker MZ can do! I really just love this program, and wanted to spread my love of it with the world a little bit! Maybe I’ll one day get into more detailed articles and step-by-step guides, we’ll have to see. Until then, feel free to download the free trial of this software and play around with it a bit! Have fun!
Happy game creating, friends!
